Topic 9 Posts

android

You're overpaying for your phone's camera

If you're using your phone camera for posting on social media, which cram the photo quality a lot, you might be overpaying for your phone's camera.

Camera-blind-test

The recent objective winners backed up by thorough tests in the phone camera department are:

  1. Google Pixel 3 XL
  2. iPhone XS
  3. Samsung Galaxy Note 9

But as MKBHD's blind camera test shows - buying a more expensive phone with a presumably better camera is not worth it if you mainly use the taken photos to post on social media. Like me, all of MKBHD's friends were blown away with the results.

If you take photos to keep the best, more natural version of the moment for a long time, then the more expensive phones are for you. But if you use your phone's photos to post on social media, and because of how they compress the images and their quality, you can actually achieve even better results with cheaper smartphones rather than posting photos from a more expensive ones.

The thing is that people assess pictures based on how they look in general, not based on the theoretical or technical details. And nowadays you can go really far just by improving the pictures with software. This is where the cheap phone shined in this review. Not only you can't see all the tiny details that more expensive phones provide because of the photos being compressed, but the over-exposed (usually just brighter) pictures from the cheap phones which use a ton of software enhancements actually feel better than the more precise photos taken with more expensive devices.

The winner of this test, Huawei Mate 20 Pro which is not a cheap phone by any means and actually has a really great hardware camera setup won because Huawei is known for their software processing for the photos. And the Pocophone F1 (Xiaomi's sub-brand) which costs only $300 came second out of 20 phones, beating the iPhones and Samsungs of this world also mostly because of improving the pictures with its software. Pocophone's camera lacks details if you zoom in the uncompressed version, but no one cares about those details when they're looking at the compressed pictures on Instagram or Twitter.

The bottom line is you can take a visually much more pleasing picture with worse hardware but then improve it with software. In fact, photo filters and manual adjustments have been there for a while enabling people posting awesome shots from not that great devices. So next time when a brand sells you how truly great their camera is, if you're doing photos just for social media, you can easily ignore that. That is what most people actually do already. Because hardware means less and less, and software wins again. But even Google who is great with their image processing algorithms lost with their Google Pixel 3 XL in the first round of comparison. And two top spots in the test won two Chinese companies, usually not very well known for their software achievements. But tables have turned.

Setting up Fastlane for mobile automatization on Mac OS

Fastlane is used to automatize different routines in mobile development. In this note (or serious of notes) I'll describe how to use Fastlane to automize your iOS project builds and uploads to TestFlight.

You start by installing latest Xcode tools
xcode-select --install

Next, you install Fastlane via RubyGems
sudo gem install fastlane -NV

or via brew
brew cask install fastlane

Then cd to your project and initialize Fastlane:
fastlane init

Last, edit fastlane/Fastfile to this:

platform :ios do

  before_all do
    ENV["FASTLANE_DONT_STORE_PASSWORD"] = "1"
    ENV["FASTLANE_USER"] = "<Your App Store Connect email"
  end

  desc "Build and upload to TestFlight"
  lane :beta do
        build_app(scheme: "<Your project's scheme>",
                      workspace: "<Your project's>.xcworkspace",
                  include_bitcode: true)
        upload_to_testflight
  end
end

If you want to store your password in the Keychain, just remove ENV["FASTLANE_DONT_STORE_PASSWORD"] = "1"

If you want to store your password in the Fastfile, add ENV["FASTLANE_PASSWORD"] = "<yourPassword>" into the before_all do / end section.

Now run 'fastlane beta' in your Terminal and enjoy an automatic build and upload to TestFlight 🙂

You can use this manual on your own computer. For running it on a remote machine look out for part 2 of this series.

Saving array of custom objects to SharedPreferences on Android

On iOS when you store an object in UserDefaults, you just put it there via setValueForKey, and it doesn't matter if you put the class there on its own, or an array of your custom classes. What matters is when you get it (them) back via objectForKey or arrayForKey, you cast the object(s) into a correct type/array of types.

On Android the principle is similar with the primitives (ints, strings, booleans, etc.) but it gets a bit tricky from an iOS-dev's perspective to store an array of objects in SharedPreferences (Android's analog for iOS's UserDefaults), but there is a solution.

First, we save your array (list) of objects:

// Needed libraries
import android.content.Context;
import android.content.SharedPreferences;
import com.google.gson.Gson;
import com.google.gson.reflect.TypeToken;
import java.lang.reflect.Type;
import java.util.List;

// Accessing SharedPreferences
SharedPreferences sp = getSharedPreferences("MyPreferences", Context.MODE_PRIVATE);
SharedPreferences.Editor editor = sp.edit();

// Saving accounts
public void saveAccounts(List<Account> accounts) {
    Gson gson = new Gson();
    String accountsJson = gson.toJson(accounts);
    editor.putString(r.getString("SavedAccounts"), accountsJson);
    editor.apply();
}

As you can see, even though we pass an array of objects, we then convert and store them actually as a string. Nothing unusual here, except storing an array of objects as a string 🙂

Where it gets interesting is when we need to get the objects back from SharedPreferences:

public List<Account> getAccounts() {
    Gson gson = new Gson();
    Type type = new TypeToken<List<Account>>(){}.getType();
    String accountsString = sharedPref.getString("SavedAccounts", "");
    return gson.fromJson(accountsString, type);
}

Here we get our array of objects as a string and convert it back to our list of accounts via Gson's built-in functionality.

Universal data+notification FCM payload for iOS+Android

In case you're following my FCM payload saga, here's a happy ending that covers most usecases with one payload which will allow you sending basic FCM messages with data and notification in them. And such messages are universal and will produce the same result on both iOS and Android. On iOS this will work out of the box, whereas on Android a small hack is neccessary to be added to the app itself.

With the payload below, you'll be able send a unified FCM message to iOS and Android and on both platforms you will receive a notifcation pop-up/heads-up message as well as pass some data to the callback method of the app which then may use it to do something meaningful in the background:

{  
   "message":{  
      "token":"<device registration id>",
      "apns":{
         "payload":{
            "aps":{
               "content-available":1,
               "alert":{
                  "title":"title",
                  "subtitle":"subtitle",
                  "body":"body"
               },
               "badge":7,
               "sound":"default"
            }
         }
      },
      "data":{
         "account":{
            "first-name":"Igor",
            "last-name":"Z"
         },
         "androidTitle":"title",
         "androidBody":"body"
      }
   }
}

iOS will use the apns part to display the notification, and pass data=>account to your app for further use. And essentially ignore the androidTitle and androidBody part.

Android on the other hand will ignore the whole apns branch, pass data=>account to the app as well and with the small hack mentioned above use androidTitle and androidBody to display a local notification.

That's a lot of power in a single payload. I hope you find it helpful 🙂

Combining data+notification payload in FCM Android

If you send this payload to an iOS device via FCM, and also invoke UNUserNotificationCenter's didReceive response: withCompletionHandler callback method, iOS will both display a text notification as well as allow you app some background time to deal with the data object you're sending along your push notification.

Unfortunately on Android even using my recommended payload you won't achieve this behavior. If you send both notification and data, only the notification will be shown, and the OnMessageReceived callback method won't be called to handle the data object.

But if you're in charge of the FCM payload creation, you can put the notification's title and body into the data object like this:

{  
   "message":{  
      "token":"<device registration id>",
      "data":{
         "account":{
            "first-name":"Igor",
            "last-name":"Z"
         },
         "androidTitle":"title",
         "androidBody":"body"
      }
   }
}

And when OnMessageReceived is called with the contents of this payload, you just create a local heads-up notification based on the info in androidTitle and androidBody with this code:

This code is a bit verbose, but is guaranteed to be working on all current versions of Android, which is invaluable 🙂 You just put androidTitle and androidBody as parameters of the method above and a nice default nofitication will appear on each message.

Now you can enjoy notification+data push notifications in a single message on Android with this hack, instead of sending two messages each time.

Firebase Android notification payload

Unlike iOS, for Android Firebase's FCM server accepts payload in slightly different form:

{  
   "message":{  
      "token":"<device registration id>",
      "android":{  
         "notification":{  
            "title":"title",
            "sound":"default",
            "body":"body"
         },
         "priority":"high"
      },
      "data":{
         "account":{
            "first-name":"Igor",
            "last-name":"Z"
         }
      }
   }
}

But there's a caveat: when both the android and data objects are present - only the notification is shown, without data being passed to OnMessageReceived FCM callback method. So in order to send both data and notification at the same time on Android you either have to send two messages - one data and one notification. Or to be a bit more creative 🙂

Custom DNS Servers

In my summary of iOS adblockers I brought up a topic of using custom DNS servers as a better way of limiting ads and tracking and here's why. On iOS this method allows to limit them even outside Safari, which is very good news, since there are no actually working ways of keeping other apps and services from tracking you unless you jailbreak your device.

DNS

I'll be getting into details of setting custom DNS Servers and DNSCrypt on iOS since it's the most limited platform in terms of options. All of the steps below are available on Windows, Mac and Android as well, which makes it the most versatile option for the most devices possible.

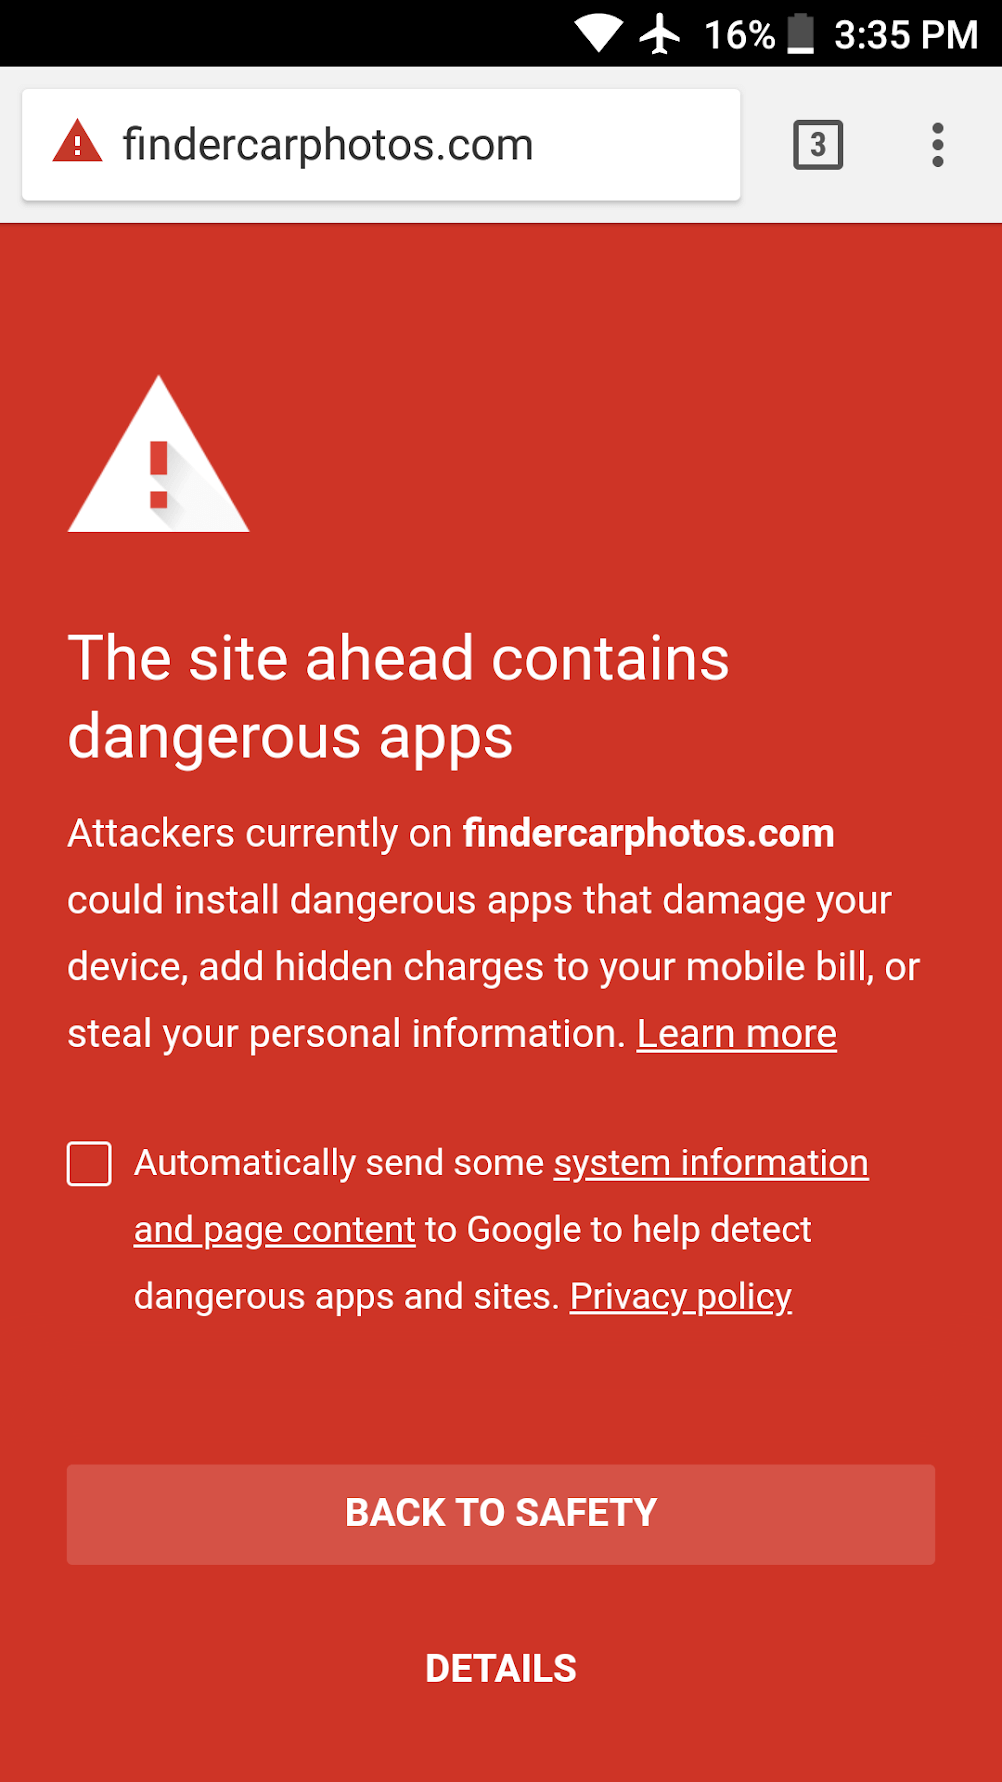
So what is a DNS? DNS is abbreviated from Domain Name System - it's a special network of servers which purpose is just to resolve domains. What that means is that when you enter any address in your browser, or any app or service that you're using connects to its service via a domain, your device which allows that connection connects to its DNS server and asks for the IP address of the domain you're connecting to. If you open google.com, your computer or mobile phone asks the IP address of the domain, receives 216.58.215.78 and connects your browser to it. But if for some reason the DNS server doesn't resolve your DNS request, your browser won't know where to connect and as a result you won't see anything. This is exactly what can be used not to see ads.

DNS is a hierarchical network with few root servers at the top. The system is built to be fail safe with backup servers in each node, but from its nature there were times when a portion of them went down making parts of the Internet inaccessible to some users. For that reason ISPs (Internet service providers) have their own copies of the main DNS servers in case they might temporary fail. They keep those copies up to date with the main servers so when there's an outage the IPSs' users won't feel anything since their DNS queries will still resolve on the ISP servers. Also potentially resolving your DNS queries in place speeds up your loading speeds comparing to the situation when your DNS query would go further than your ISP servers which would just take longer to do.

Usually when you connect your device to any router, it will give you static IP addresses of the DNS servers the router is set up to share. The routers of your ISP are pre-set with their DNS servers, the same happens when your phone gets cellular connection - phone's DNS servers are also set for you. And most ISPs in order to keep users away from messing up with their Internet keep those DNS IP addresses hidden from change.

But why would you want to change your DNS servers? Well there are few reasons for that:

  1. Your DNS provider (most often your ISP) has his own non-objective interests in mind. If it's a governmental ISP in Russia, they might wanna block their subjectively harmful websites, and not resolving the DNS query for those domains is an easy way of doing it. Your browser would just tell you that it 'couldn't resolve host name'. Or if your ISP provides additional services, they might just block their online competitors that way, leaving you out only with the options they want you to have. These examples are a bit extreme, but worth mentioning since all of the scenarios are easily possible. Even though when blocking, ISPs do a bit further and just block all the traffic to specific resources and not just DNS queries. And in that case only VPNs are your only option to get around the limitations.
  2. Your DNS provider has less incentive than you on blocking ads and trackers since it sometimes might break the website you're watching or maybe your ISP shareholders are also partial owners of an advertising group, etc. And this is where your custom DNS server might help you out when your ISP won't, by setting up few rules not to resolve the domains which usually serve ads or track your online behavior and identity and afterwards sell that information again to advertisers.

As mentioned before the DNS system consists of root and other big servers that resolve people's queries from all over the world. But not only your ISP has a copy of the domain names and their IP addresses. Any private company or even regular people can set up their own DNS server. The only difference is that the root servers are operating mostly independently, following objective rules and are considered safe to be used by everyone, unlike some Joe's public DNS server. Big companies also have their own DNS servers, in particular Google with its 8.8.8.8 and CloudFare (cloud service provider) with 1.1.1.1. And even though Google is a trusted company, I wouldn't trust them to resolve my DNS queries, even though they probably filter out malicious ones for good reasons, but their core business is about ads, so they may be doing that for competitive reasons, filtering competition out, and leaving only their own domains responsible for tracking 🙂

That's why after CloudFare revealed their DNS few months ago I started using them right away, since their core business relies on making the Internet faster and safer not as a byproduct of serving ads. I couldn't switch my router to serve their DNS to all my home devices since my ISP hid the option, so I had to setup all my devices manually.

DNS-Mac

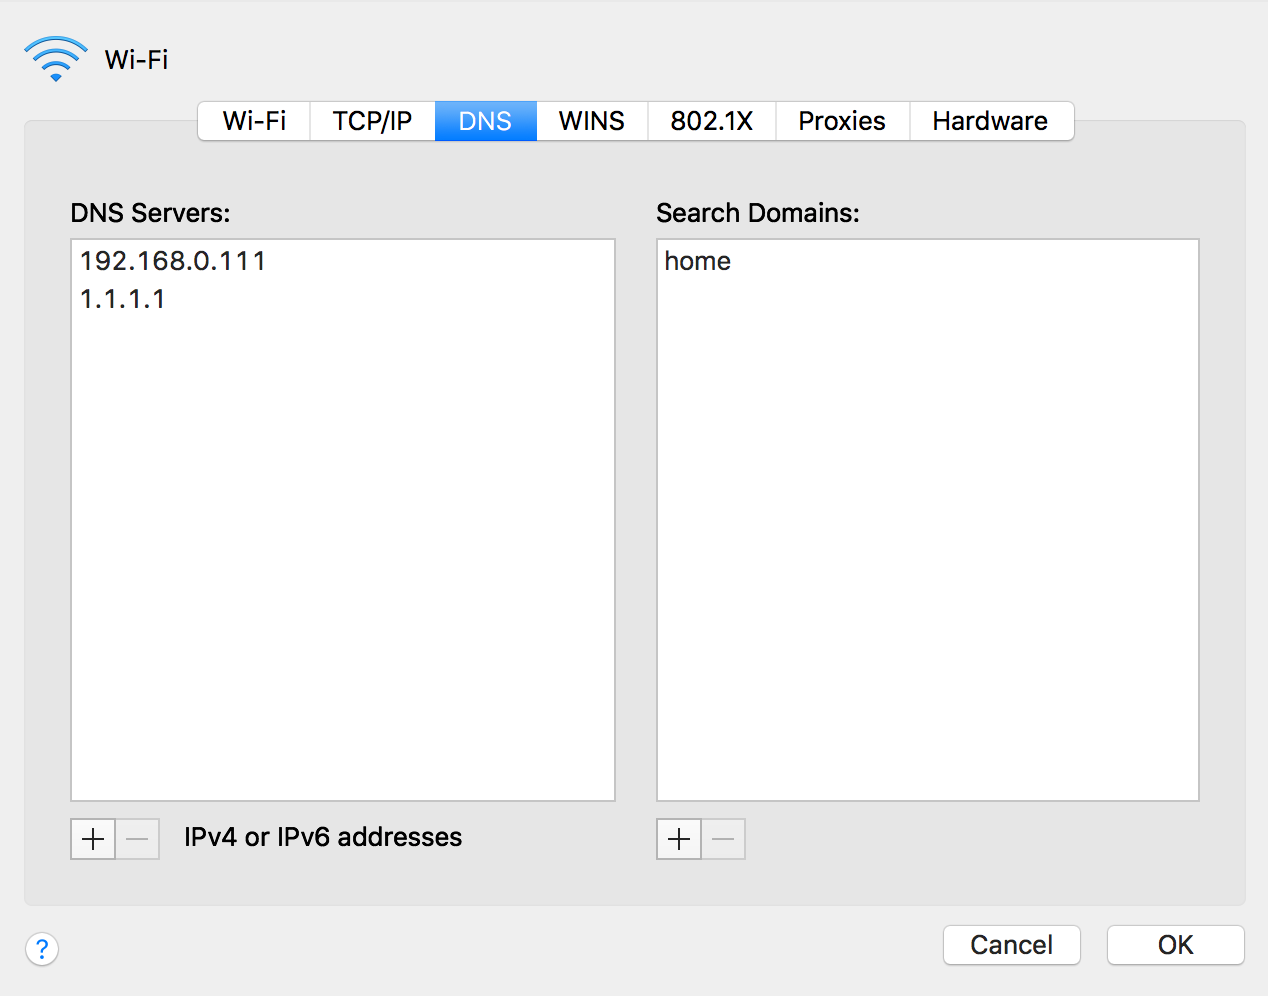
It's very easy doing it on Mac OS: you go to Settings.app -> Network, push 'Advanced' on your connection of choice (Wi-Fi, Ethernet, etc.) and on the 'DNS' tab add 1.1.1.1 and confirm the changes - that easy! You can repeat it on all of your Macs and PCs and this setting will stay even while connecting to other wireless or wired networks, neat!

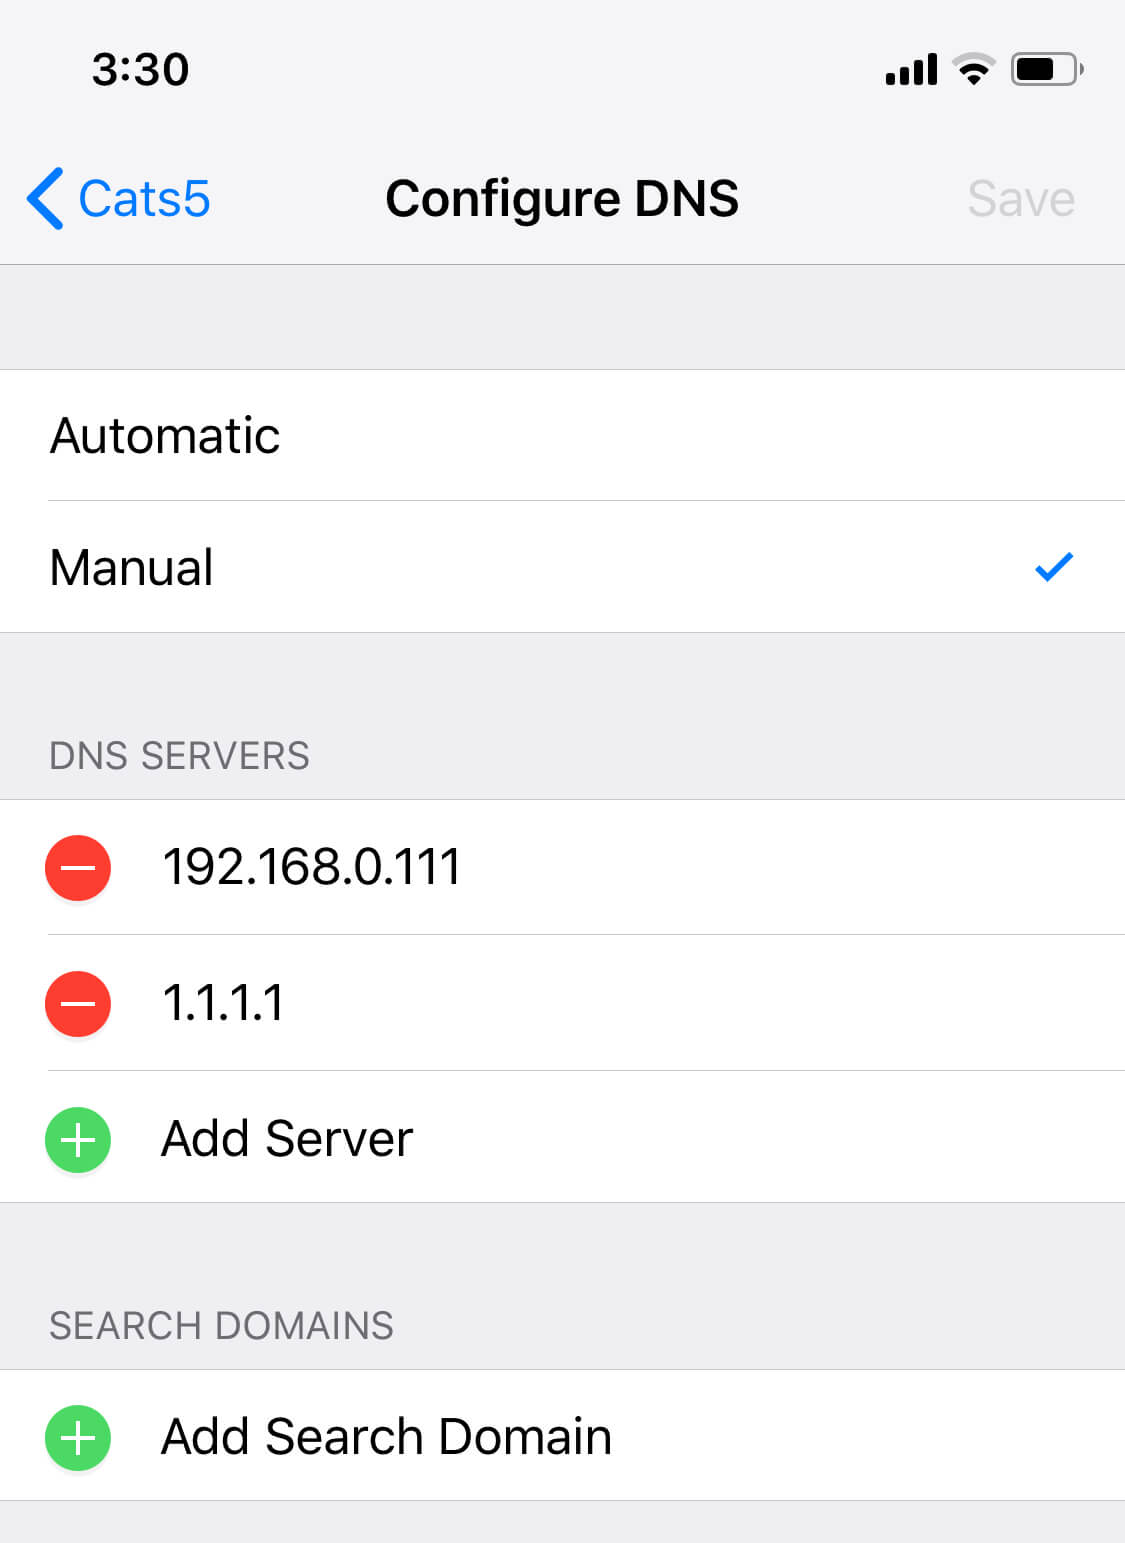
On Android and iOS the DNS setting is per each wireless network. So if you use few on a constant basis - unfortunately you will have to repeat this process for each of the networks: open Settings.app -> Wi-Fi, tap on the 'i' icon next to your connected network and then on 'Configure DNS' at the bottom, select 'Manual' and enter 1.1.1.1 as well. Save changes, enjoy your faster and more secure Internet 🙂

DNS-iOS

The setup on Android is almost identical and I'm sure you will find it after going through the same sequence.

Adblocker privacy

Adblocker-privacy

After scratching the surface with my best Android adblocker review and the tl;dr version of the results I wanted to share a deeper take on the privacy aspect of using adblockers.

The Adblocker Results #2 and deeper insights (longer, recommended version)
Let's get back for a second to the apps that didn't make the cut as the adblocker options I've tested:

  • Free Adblocker Browser - was crashing after start not giving the option to test it at all
  • AppBrain Ad Detector - detects apps on your device which might send your data. Marked Facebook app as highly malicious 🙃
  • AdAway - requires root, so it's not an option for everyone
  • TrustGo Ad Detector - asks all possible permissions upfront (how reading my messages or call info would help me stop seeing ads on the web?) which you never should allow unless you're completely sure what you're doing. The irony with the 'TrustGo' name is actually really funny. Trust them all with your data and go away 😃 Uninstalled.

The last app actually brings up an important topic with adblockers - privacy. The thing is, when you allow any adblocker to work on any of your platforms, what you essentially are allowing it is getting access to all your browsing information, so the adblocker can see it and cut out ads and/or trackers. That's why if you don't want your adblocker instead of blocking ads actually use your browsing data for serving you even more personalized ads, make sure you install a trusted one.

As you probably know by now, there are few ways of blocking ads: by using adblocker extensions for Yandex Browser and Samsung Internet browser (and maybe others that didn't cross my eyes), or using a standalone browser like the AdBlock Browser with adblocking already built in. Both ways do their job in a reasonable manner, but what if you're using Google Chrome as your default browser and you don't want to give up bookmarks, passwords and history sync with your Google Account? For that case there is a third option which enables you not only block ads in Google Chrome but block them overall, through your whole system. And it's done by installing a sideloaded apk which creates a local VPN server on the device itself and sends and receives all the Internet traffic through it, filtering it on the fly. How insane is that? Setting a local VPN server on your cellphone - Android never stops impressing me with its crazy hacks.

When you (or in our case the app on your behalf) setup a local VPN, except being able to filter ads and trackers on a much wider scale, throughout the whole system and in all of your apps you'll get two additional advantages if you compare such solution to connecting to the Internet via a traditional remote VPN:

  1. Unlinke remote ones, local VPNs don't consume almost no additional battery power for the same filtering operations
  2. Local VPNs don't add that painful additional delay of your phone transferring all the data through a remote server. As the result you get ad filtering without sacrificing your Internet connection speed.
    But there are few disadvantages as well:
  3. Local VPNs usually don't encrypt your traffic like remote VPNs do, so you don't get that additional layer of security
  4. Your device IP address will still be the same, so you won't be able to go around IP-based resource blocking, Great Firewalls, access restricted websites unlike while using remote VPNs.

That said, when you're using VPNs on Android you have to choose between fast and efficient adblocking or slow but secure Internet browsing. If you know any way that combines the two - please hit me up 🙂

Since usually no one usually would setup a local VPN for blocking ads on their own, that means we'll have to rely on someone's solutions. And by rely I mean trust some company not to use our browsing data in malicious ways. We already have issues trusting big companies like Google, Facebook or Apple which have something meaningful to loose if it turns out they are in fact using our data for their own advantages and without our consent. But what about smaller companies? On one hand for them loosing trust often means just getting out of business, since small companies usually are barely profitable and can't afford loosing any substantial part of their userbase by being involved in privacy scandals. On another hand such companies have more incentive to get those few additional bucks by selling your data in order to survive. And frankly after the latest news of Facebook beating their all time high stock prices even after privacy controversies, it sends a wrong signal to companies which collect any kinds of data that it's okay to leak or sell it - people won't care anyway and investors would still love you.

That being said it means that nobody except you won't really care about your privacy. And even though as mentioned in the first part of the research AdGuard's local VPN does the best job filtering ads not only in Google Chrome that doesn't support adblockers, but in other apps and throughg the whole system in general, people are legitimately concerned about the safety of using any AdGuard's products since their team is actually based in Russia and registered on the non-neutral law-enforcement Cyprus. Even though the openness of the developer and opensourcing their products help a bit, they still don't overcome the overall fear of using any kinds of tools (especially those ones that potentially can snoop your traffic) coming from Russia and that those tools and their developers are considering privacy like they should. Because of that on Android as the adblocker browser extention I would recommend using Adblock Plus which was build as a non-profit organization from the ground up and uses donations to keep developing their product. Having AdGuard's local VPN set to high filtering mode and enablihg https filtering is your best bet against ads but you may risk with your privacy instead. But if you still looking forward to a local VPN you can trust, I highly recommend you another free open-source project Blokada built by a few guys in their spare time that don't have a big company behind them with big expenses that need to be covered by potentially selling end user's data or whitelisting ad companies which usually is another form of income for adblocking companies. Granted AdGuard has a paid Pro iOS app and a subscription business model, but I doubt their earnings from those on a market with generally free adblocking solutions (including their own) is enough for you to trust them with your data.