Topic 12 Posts

ios

WWDC'19 Summary

This was a big one.

The dev conference started with a TV series announcement trailer πŸ˜‘

WWDC-2019

tvOS 13

  • PS4/Xbox One controller support
  • New wallpapers

watchOS 6

  • New watch faces
  • Hourly beeping sound
  • Audiobooks, voice memos, calculator
  • Independent standalone apps
  • Audio streaming API
  • Own App Store
  • Activity trends
  • Noise app to monitor noise pollution
  • Cycle tracking
  • Health summaries
  • New bands

iOS 13

  • Speed improvements
  • Dark mode
  • Improved Safari, Mail, Notes, Reminders
  • Improved Maps with Street View (SF only as usual?)
  • β€˜Just once’ location access option
  • Sign in with Apple - private social login
  • One-time email address generation
  • HomeKit secure video
  • iMessage avatar pictures
  • Enhanced Memoji with earrings, teeth, eyeshades, etc.
  • Memoji stickers
  • Improvements to photo capture and post-production
  • Rotate videos, filters and effects for videos
  • ML to remove photo dupes and choose the best of them
  • Improved Photos.app to remove clutter and let focus on important moments
  • AirPods reading and replying to messages
  • AirPods audio sharing
  • HomePod handoff
  • Siri live radio support with iHeartRadio, TuneIn, etc. 100k stations.
  • Updated CarPlay
  • CarPlay integration with 3rd party apps
  • Neural TTS - much better sounding Siri voice

iPadOS 1?

  • Much improved multitasking
  • Multi-window support for the same app
  • Improved Files.app
  • iCloud Drive folder sharing
  • SMB File sharing
  • Mass Storage Device support
  • External device support via usb-c
  • Desktop class browsing on Safari iPad
  • Download manager
  • Custom fonts
  • Working with text is now much easier
  • Apple Pencil latency down to 9ms from 20ms
  • New notes app
  • PencilKit

New Mac Pro

  • 28-core Xeon CPU
  • 12 DIMM slots
  • PCIe expansions
  • Special dual-core Vega II GPU
  • Custom designed video processing card
  • 1.4kW PSU
  • Optional wheels
  • New 6k, HDR, anti-reflective, 1000 nits display
  • Mac pro starts at $5999, new display at $3999/$4999

MacOS 10.15 Catalina

  • iTunes now broken down into Apple Music, Podcasts and Apple TV apps
  • iPhone sync moves to Finder
  • Podcasts will have content search
  • Apple TV 4k HDR playback on Mac
  • Sidecar - wireless connectivity tablets as second screens/tablets
  • Voice control
  • Improved find my Mac even when it’s offline
  • ScreenTime

Dev Tools

  • iPad apps migration tool to Mac
  • RealityKit - kit for building photorealistic scenes, includes 3d scene tools
  • ARKit3 with real-time people occlusion, motion capture
  • Real-world Minecraft
  • SwiftUI - new UI framework written in Swift - less code, live preview in sim and device (sic!)
  • Native UI framework for watchOS

It was probably the most packed WWDC I've seen. I hope all of the new stuff will be working reliably when it's out πŸ™‚

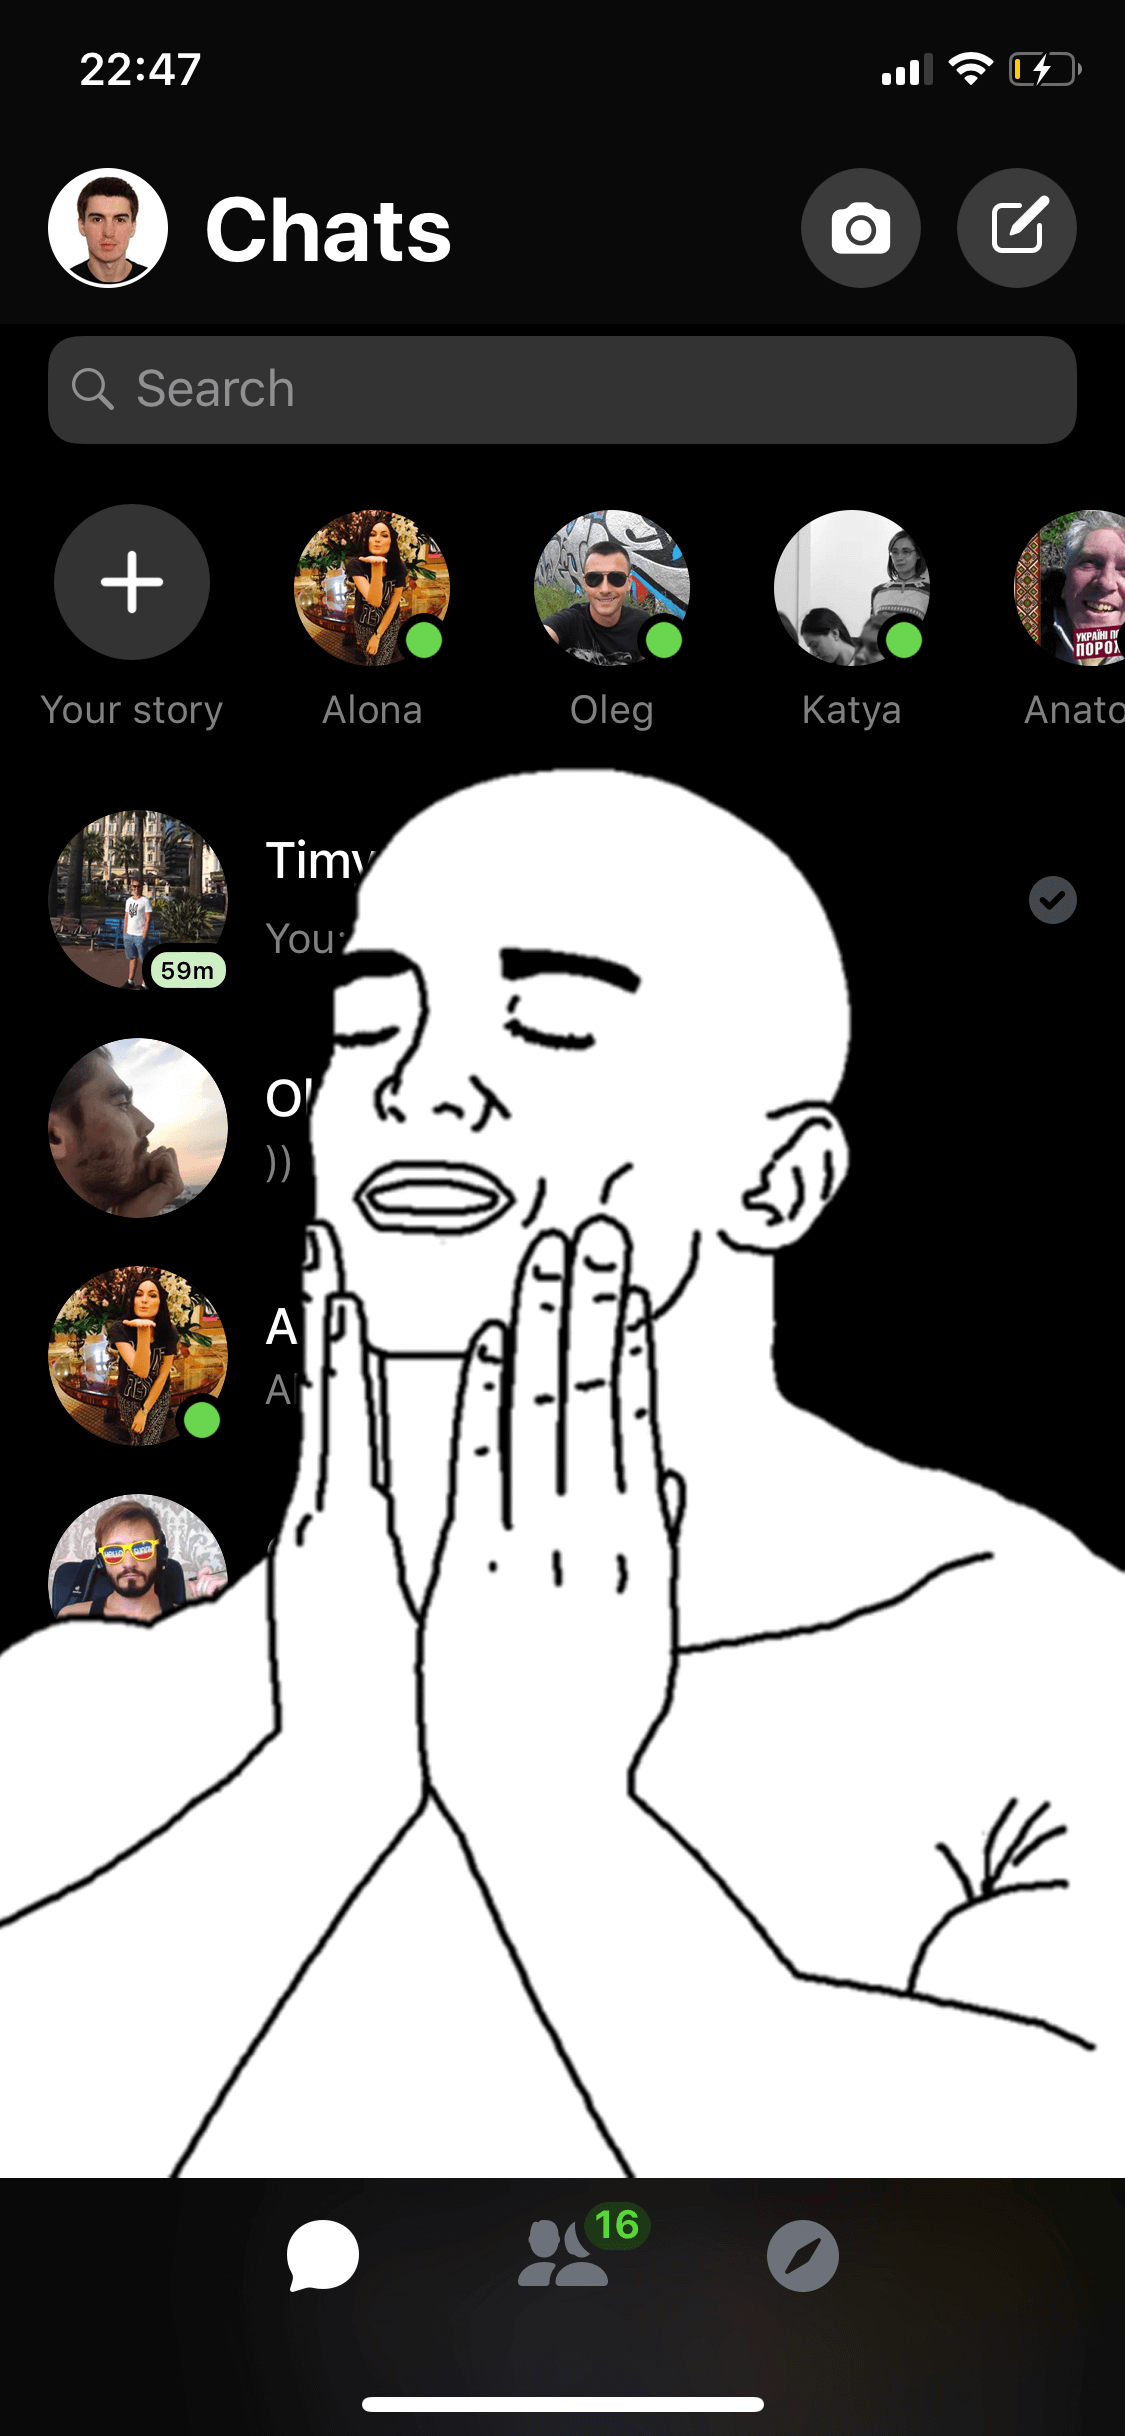
FB Messenger iOS dark mode hack

For the last year of using an unofficial Messenger Mac client Caprine that has an unofficial dark mode I just couldn't understand why the official iOS Messenger app doesn't have dark mode for years. But now it's there. Sort of.

FB-Messenger-dark-mode

Overall I wonder how this have been found in the first place, but it works:

  1. In the messenger send anyone the πŸŒ™ (moon) emoji
  2. Accept the dark mode prompt
  3. Switch it on
  4. Enjoy

Can't wait to have it in more apps and hopefully system wide in iOS 13 this summer-autumn. But for now it's the best I can have for an app I probably use the most often among others.

You're overpaying for your phone's camera

If you're using your phone camera for posting on social media, which cram the photo quality a lot, you might be overpaying for your phone's camera.

Camera-blind-test

The recent objective winners backed up by thorough tests in the phone camera department are:

  1. Google Pixel 3 XL
  2. iPhone XS
  3. Samsung Galaxy Note 9

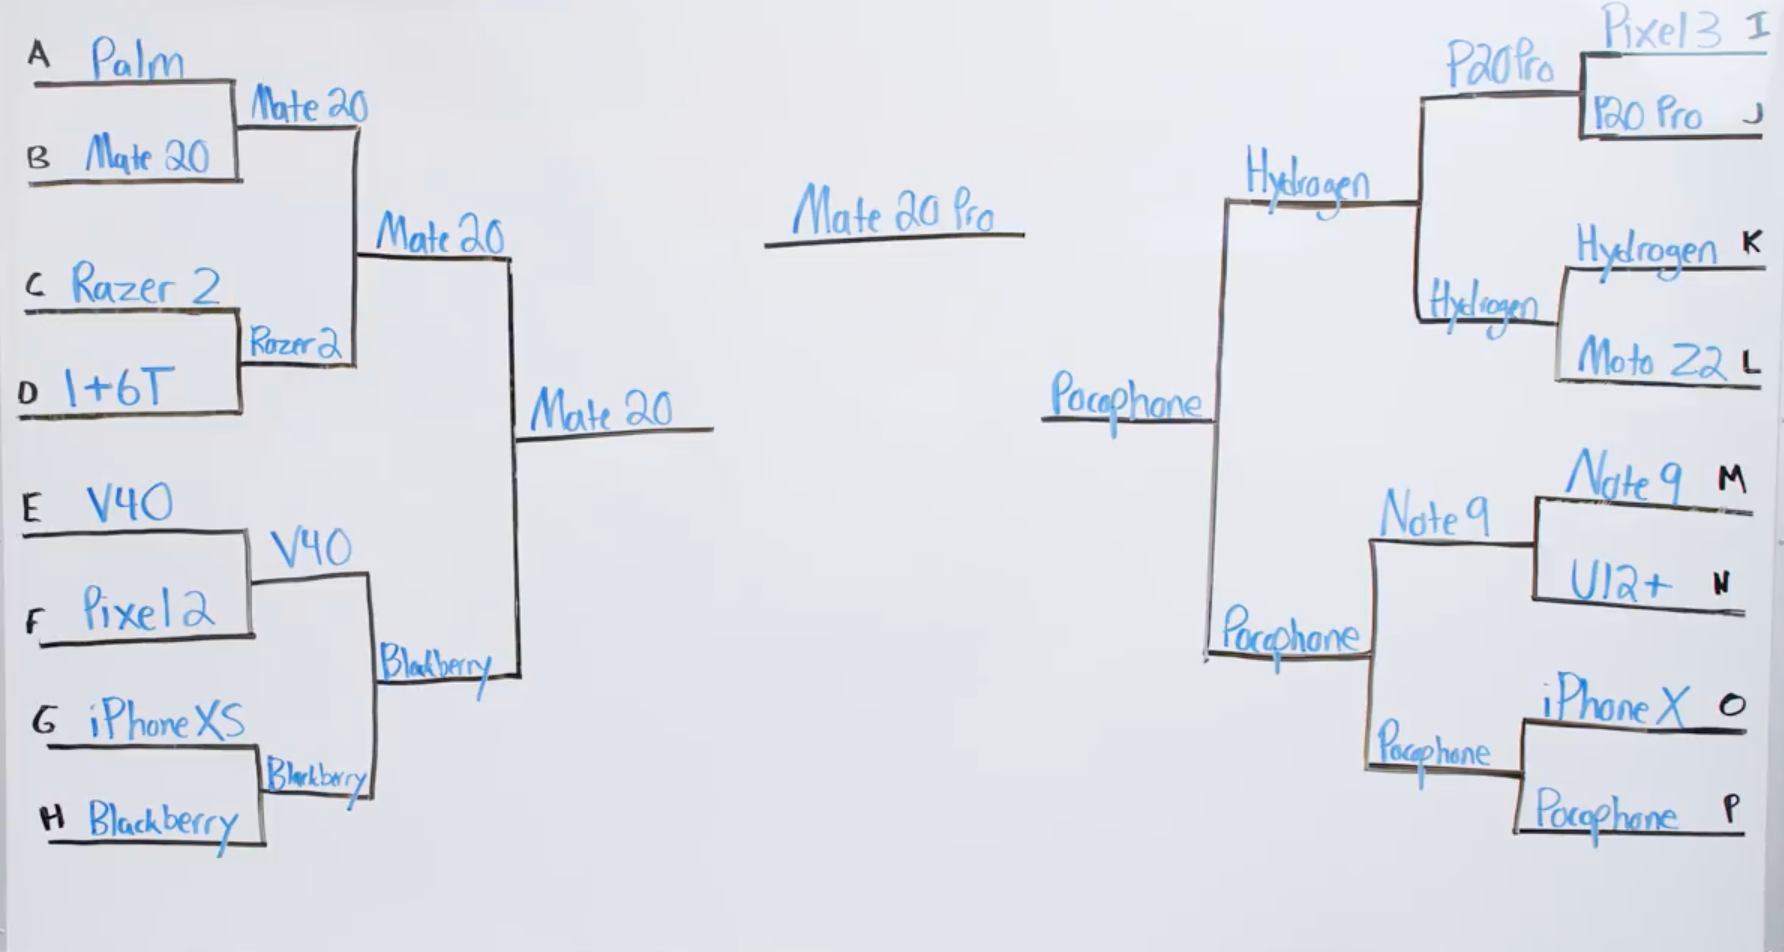
But as MKBHD's blind camera test shows - buying a more expensive phone with a presumably better camera is not worth it if you mainly use the taken photos to post on social media. Like me, all of MKBHD's friends were blown away with the results.

If you take photos to keep the best, more natural version of the moment for a long time, then the more expensive phones are for you. But if you use your phone's photos to post on social media, and because of how they compress the images and their quality, you can actually achieve even better results with cheaper smartphones rather than posting photos from a more expensive ones.

The thing is that people assess pictures based on how they look in general, not based on the theoretical or technical details. And nowadays you can go really far just by improving the pictures with software. This is where the cheap phone shined in this review. Not only you can't see all the tiny details that more expensive phones provide because of the photos being compressed, but the over-exposed (usually just brighter) pictures from the cheap phones which use a ton of software enhancements actually feel better than the more precise photos taken with more expensive devices.

The winner of this test, Huawei Mate 20 Pro which is not a cheap phone by any means and actually has a really great hardware camera setup won because Huawei is known for their software processing for the photos. And the Pocophone F1 (Xiaomi's sub-brand) which costs only $300 came second out of 20 phones, beating the iPhones and Samsungs of this world also mostly because of improving the pictures with its software. Pocophone's camera lacks details if you zoom in the uncompressed version, but no one cares about those details when they're looking at the compressed pictures on Instagram or Twitter.

The bottom line is you can take a visually much more pleasing picture with worse hardware but then improve it with software. In fact, photo filters and manual adjustments have been there for a while enabling people posting awesome shots from not that great devices. So next time when a brand sells you how truly great their camera is, if you're doing photos just for social media, you can easily ignore that. That is what most people actually do already. Because hardware means less and less, and software wins again. But even Google who is great with their image processing algorithms lost with their Google Pixel 3 XL in the first round of comparison. And two top spots in the test won two Chinese companies, usually not very well known for their software achievements. But tables have turned.

iOS 12 release πŸŽ‰

Best features:

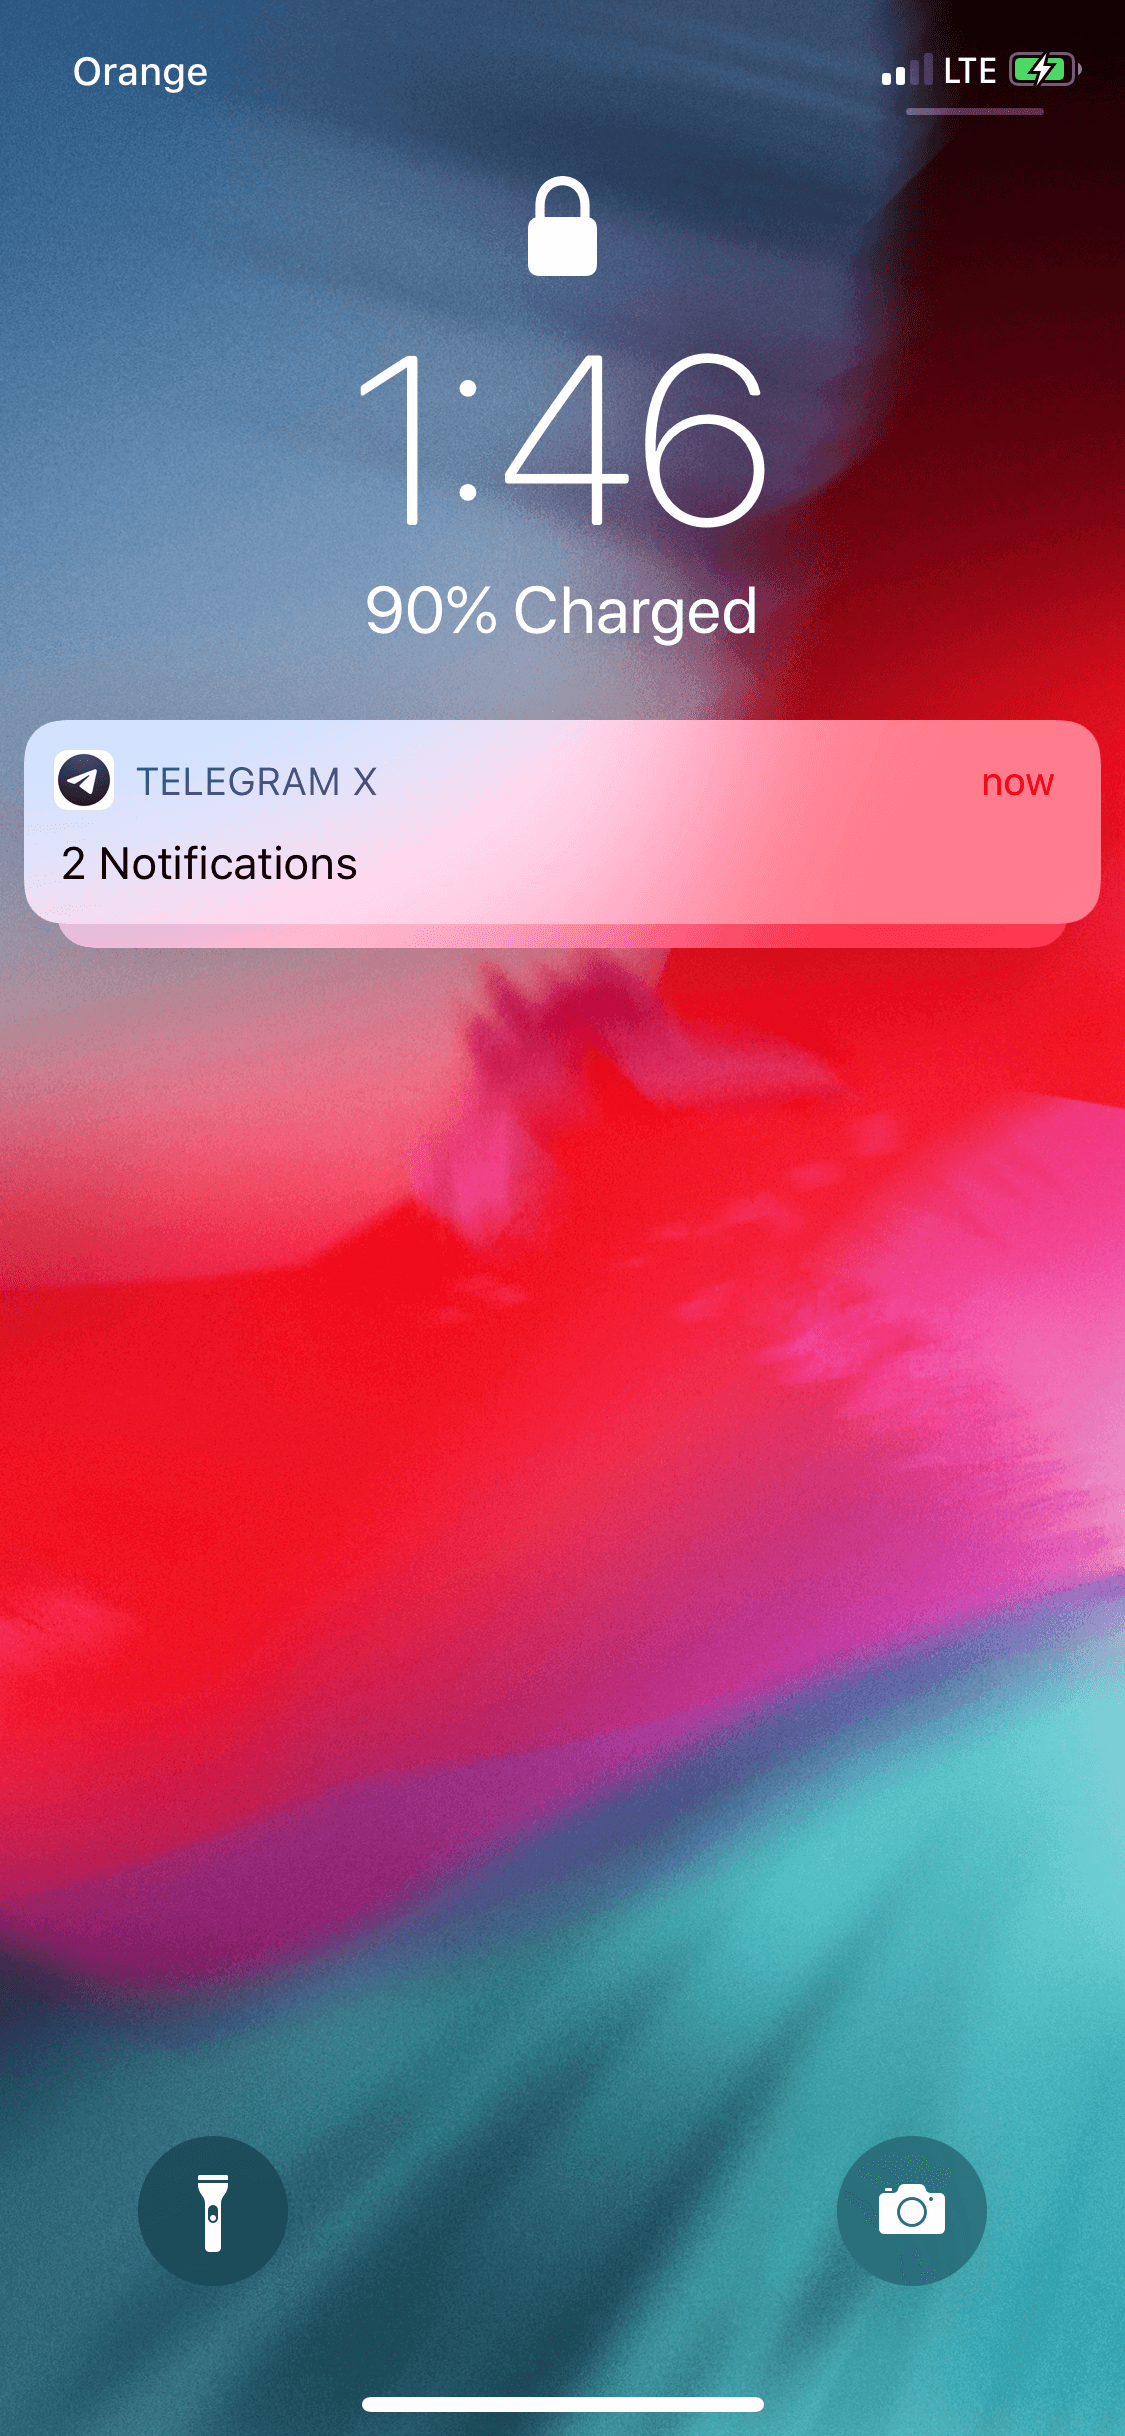
  • Group notifications
    iOS12-1

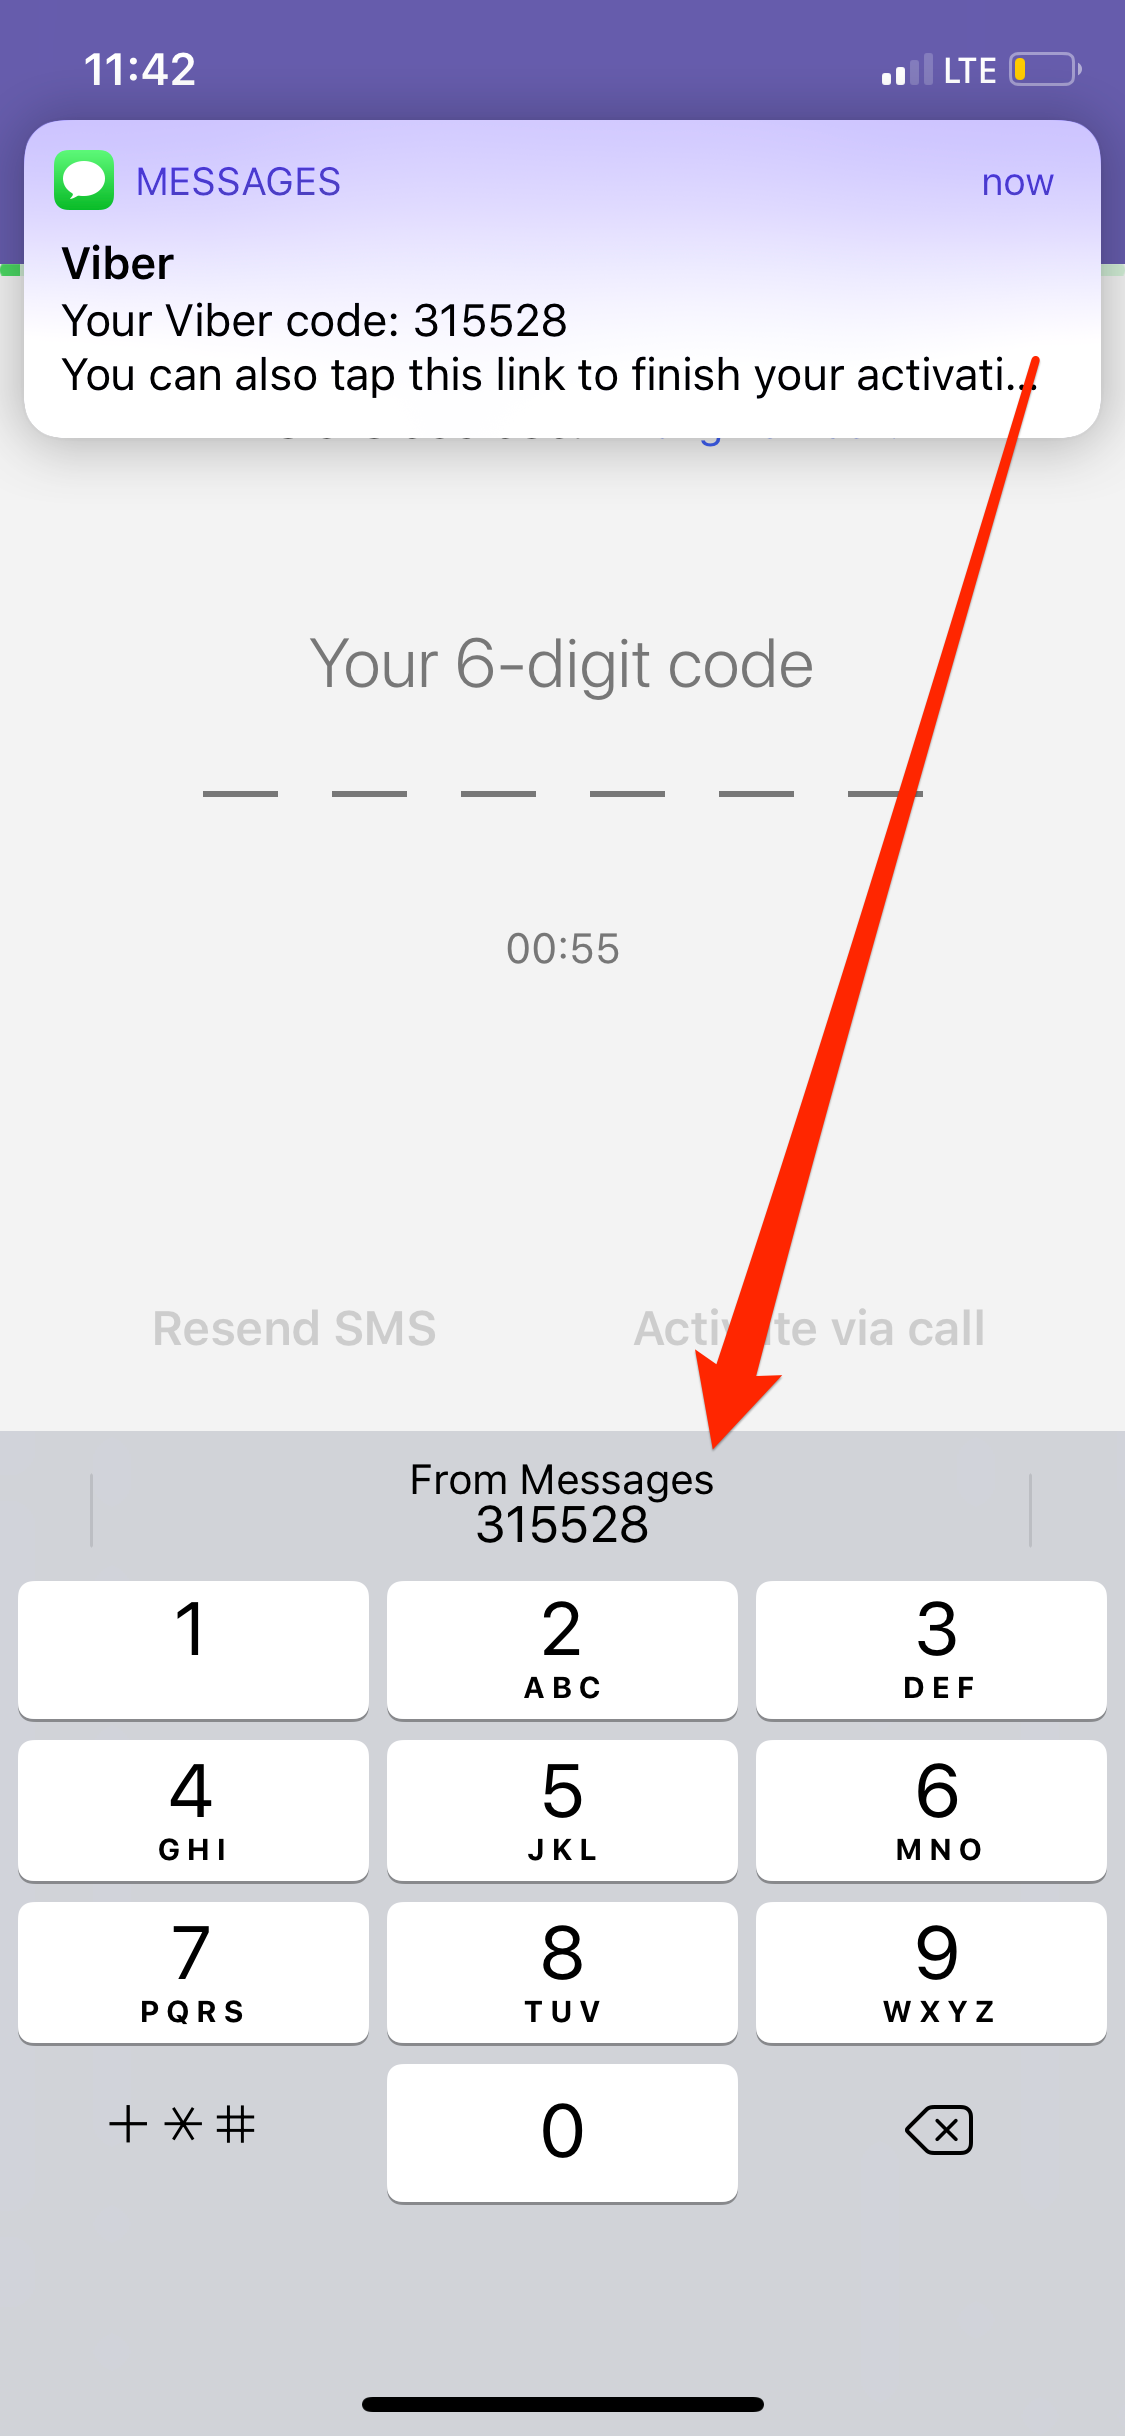
  • SMS passwords filling in
    iOS12-2

  • Password suggestions
    iOS12-3

  • Siri shortcuts
    iOS12-4

  • Runs faster even on older devices

Setting up Fastlane for mobile automatization on Mac OS

Fastlane is used to automatize different routines in mobile development. In this note (or serious of notes) I'll describe how to use Fastlane to automize your iOS project builds and uploads to TestFlight.

You start by installing latest Xcode tools
xcode-select --install

Next, you install Fastlane via RubyGems
sudo gem install fastlane -NV

or via brew
brew cask install fastlane

Then cd to your project and initialize Fastlane:
fastlane init

Last, edit fastlane/Fastfile to this:

platform :ios do

  before_all do
    ENV["FASTLANE_DONT_STORE_PASSWORD"] = "1"
    ENV["FASTLANE_USER"] = "<Your App Store Connect email"
  end

  desc "Build and upload to TestFlight"
  lane :beta do
        build_app(scheme: "<Your project's scheme>",
                      workspace: "<Your project's>.xcworkspace",
                  include_bitcode: true)
        upload_to_testflight
  end
end

If you want to store your password in the Keychain, just remove ENV["FASTLANE_DONT_STORE_PASSWORD"] = "1"

If you want to store your password in the Fastfile, add ENV["FASTLANE_PASSWORD"] = "<yourPassword>" into the before_all do / end section.

Now run 'fastlane beta' in your Terminal and enjoy an automatic build and upload to TestFlight πŸ™‚

You can use this manual on your own computer. For running it on a remote machine look out for part 2 of this series.

Universal data+notification FCM payload for iOS+Android

In case you're following my FCM payload saga, here's a happy ending that covers most usecases with one payload which will allow you sending basic FCM messages with data and notification in them. And such messages are universal and will produce the same result on both iOS and Android. On iOS this will work out of the box, whereas on Android a small hack is neccessary to be added to the app itself.

With the payload below, you'll be able send a unified FCM message to iOS and Android and on both platforms you will receive a notifcation pop-up/heads-up message as well as pass some data to the callback method of the app which then may use it to do something meaningful in the background:

{  
   "message":{  
      "token":"<device registration id>",
      "apns":{
         "payload":{
            "aps":{
               "content-available":1,
               "alert":{
                  "title":"title",
                  "subtitle":"subtitle",
                  "body":"body"
               },
               "badge":7,
               "sound":"default"
            }
         }
      },
      "data":{
         "account":{
            "first-name":"Igor",
            "last-name":"Z"
         },
         "androidTitle":"title",
         "androidBody":"body"
      }
   }
}

iOS will use the apns part to display the notification, and pass data=>account to your app for further use. And essentially ignore the androidTitle and androidBody part.

Android on the other hand will ignore the whole apns branch, pass data=>account to the app as well and with the small hack mentioned above use androidTitle and androidBody to display a local notification.

That's a lot of power in a single payload. I hope you find it helpful πŸ™‚

Firebase iOS push payload

If you're using Firebase and its FCM (Firebase Cloud Messaging) server directly to send out notifications to iOS users, you might wonder what kind of payload you should send to Firebase in order for the information to be delivered.

So wonder no more πŸ™‚

{
   "message":{
      "token":"<device registration id>",
      "apns":{
         "payload":{
            "aps":{
               "content-available":1,
               "alert":{
                  "title":"title",
                  "subtitle":"subtitle",
                  "body":"body"
               },
               "badge":7,
               "sound":"default"
            }
         }
      },
      "data":{
         "account":{
            "first-name":"Igor",
            "last-name":"Z"
         }
      }
   }
}

In case you need, here's an example of the payload for Android

Custom DNS on iOS via DNSCrypt

DNSCrypt

In previous posts about adblockers and VPNs for iOS I covered all the pros and cons of both approaches. TLDR: on iOS adblockers help you only in the browser but barely improve your privacy, whereas VPNs do both well but at the expense of your Internet speed, both on cellular and Wi-Fi.

After going through blockers, I mentioned setting custom DNS servers as a mean of filtrating ads and trackers on the domain name level. And you can do that fairly easily on Mac, iOS and Android while being connected to the Internet via Wi-Fi but you can't do that on cellular.

...Actually there is a chance and it's called DNSCrypt. In short this is a way of communicating with a DNS server not via regular DNS protocols which your carrier and your mobile device don't let you adjust. The connection to a DNS server of your choice is established via HTTPS, so it's secure, and you can customize it. The only requirement is that your DNS provider of choice should support resolving domains via HTTPS (usually 443 port) in addition to the usual 53 DNS port.

Luckily, my 1.1.1.1 DNS server of choice (provided by CloudFlare) supports DNS queries via HTTPS as well. So the only thing I had to do is to install DNSCloak for iOS, find 1.1.1.1 in the supplied list of DNSCrypt-enabled DNS servers and push 'start'. That establishes a 'VPN' connection which is not actually VPN since it doesn't send all your traffic to another server, just the DNS queries. And as a result you get your ads and trackers filtered on a domain level, without the downside of speed decrease which all traditional VPNs have in common.

As a recommendation you can make your DNSCrypt connection to be more stable. To do that open Settings.app, then go to General -> VPN, tap the 'i' button next to 'DNSCloak' and then switch on 'Connect On Demand' at the bottom.

In case you have your own pi-hole DNS server facing the open Internet (which you should do carefully or don't do at all), or you know a public one you can trust - you can enable it in DNSCloak and have even more strict DNS filtering than Google or CloudFare provides. They are public DNS servers and they are more conservative on filtering out stuff not to accidentally block websites used by the general public (e.g. blocking Facebook's tracking 'like' buttons may block Facebook at all). But that doesn't mean your pi-hole DNS server of choice can't be more strict πŸ™‚